¶ Information on the Client Admin Portal
The purpose of the Client Admin Portal is to give the means to create, modify, remove Virtual Terminal users, create new API tokens, and inspect active/expiring tokens.
¶ Accessing the Client Admin Portal
You will be asked to provide the full name, e-mail address, and cell phone number for individuals you wish to have access to the portal. Once their accounts have been created, those individuals will receive a text message containing their username and and an e-mail containing their password and the URL of the portal.
Our Admin Portal utilizes two-factor authentication. Users accessing the portal will be asked to enter their username and password. They shall then be asked to enter a security code that will be sent via a text message to their cell phone.
¶ Integrator Token Renewal
There are two methods to generate token renewals. Json Post and Classic:
¶ Json Post
Once you have logged in, you will be at the home screen. On the left hand side of the screen is the main menu. As an integrator, you will only be concerned with the options under the Manage Tokens heading.

The Active Tokens option allows you to view all of tokens that have been assigned to your accounts and shows you their expiration date and what their current status is. This screen can be useful for administrators to see what tokens are nearing their expiration dates. Columns can be sorted by clicking on the column header.

The Token Renewal option allows you to select the accounts that you wish to issue new tokens to. It also provides you with a summary of the total number of active tokens that are assigned to each account.

After selecting the accounts you wish to renew, you will be presented with a summary screen that shows all of the new token information.

Next you will be given the option of how you wish the token information to be posted. You can simply copy the text fromt he screen manually or post the Token to a supplied URL of your choosing. Note that multiple tokens are separated with a pipe.

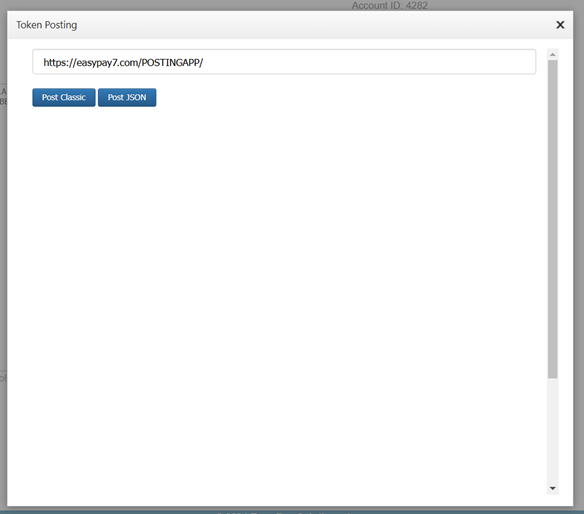
You can select Post Classic (see below) to post your token to your URL with the classic method or select Post JSON button to make an API call that will send a JSON array of tokens to your URL.

When you select "POST JSON" we will create a Json Array named "TOKENS" and write it directly to the URL you specify.
You can obtain this data by directly accessing the InputStream at your server endpoint.
C# Example
string json;
using (var reader = new StreamReader(Request.InputStream))
{
        json = reader.ReadToEnd();
}
The JSON token array will look like this:
¶ Classic
Once you have logged in, you will be at the home screen. On the left hand side of the screen is the main menu. As an integrator, you will only be concerned with the options under the Manage Tokens heading.

The Active Tokens option allows you to view all of tokens that have been assigned to your accounts and shows you their expiration date and what their current status is. This screen can be useful for administrators to see what tokens are nearing their expiration dates. Columns can be sorted by clicking on the column header.

The Token Renewal option allows you to select the accounts that you wish to issue new tokens to. It also provides you with a summary of the total number of active tokens that are assigned to each account.

After selecting the accounts you wish to renew, you will be presented with a summary screen that shows all of the new token information.

Next you will be given the option of how you wish the token information to be posted. You can simply copy the text fromt he screen manually or post the Token to a supplied URL of your choosing. Note that multiple tokens are separated with a pipe.

Once you have made your selection, click on the Post Token URL button. You will be given a window in which you can enter the posting URL of your choice. If you have already provided us with one, that URL will be already entered into the window by default. You may however still manually enter in a different URL at this point.

Once you have the correct posting URL entered, click on the POST button.
Appended to the end of your posting URL will be a portion that looks like this: ?TokenFile=”someQaulifiedURI”. This is what you will use to download your token file.
For example: ?TokenFile=https://easypay5.com/ClientAdminPortalR101/Content/ManageTokens/Tempfile/f7048.txt
The file will contain the token information in an encrypted format consisting of an initialization vector and the data itself, separated by an equals sign. The first 12 characters are the initialization vector. The remaining characters are the encrypted message.
For example: xts/VQqO3XY=mJjvA64NIeJZRO8T2AwjcBwmiHSyWUPyxOwppWbObhz4Q99Oa/a/xz7dnVccGRtKSU4uee4vKYmRtpJWqOnpvxVyGEPPtliKJrnfqIsVVlrLO3/9PloUBzeorX3d9HvCsgX9QcO7fPGbt/rpbfTLeUtk5OJhguEMbre7g1MX1FlM4xGI3/Hq362Lpg2LIJ1KIXXArBSDhLAq5yAXjRFwjQTzV81UITTEZN+HLNklVIcqpVPa0IFhxg==
As an integrator, you will have already been provided with a unique encryption key, also referred to as an E-Index. This is the key that you will use to decrypt the token file. Once decrypted, the above example would now look like this: Account name, account ID, token, token ID, and expiration date with multiple tokens again being separated by a pipe.
EASY PAY DYNA PRO TEST,EP4397937,533825D35E2B4EXXXXXXXXXX54A0AF73,4804,2/8/2017 2:50:06 PM|EASYPAY HEALTH CARE TEST,EP9948514,4C9AA0E6194847XXXXXXXXXXC3427D64,4805,2/8/2017 2:50:06 PM
The token ID is of particular importance as it is the reference number by which Easy Pay Support can look up your token should you require any assistance.